
Construction of the Revell kit for the USS Evans Alumni Association
USS Evans.
Previous Page | Next Page | Table of Contents
click pictures for a larger version
Beginning & Research
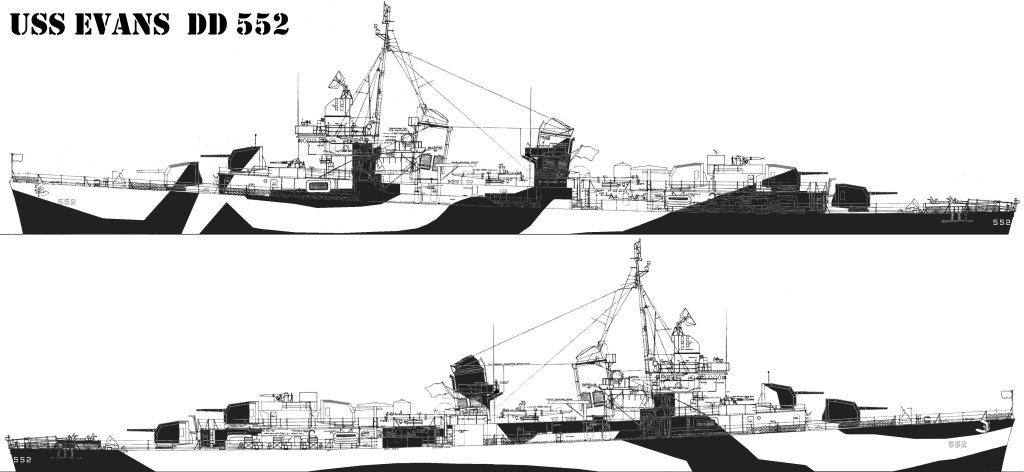
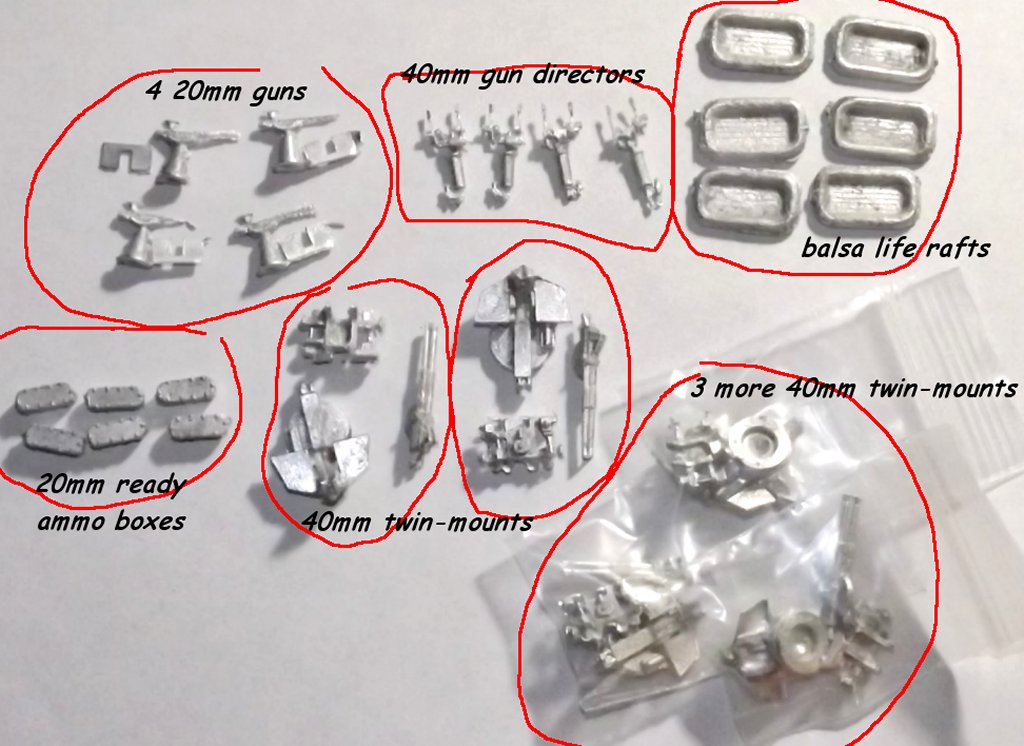
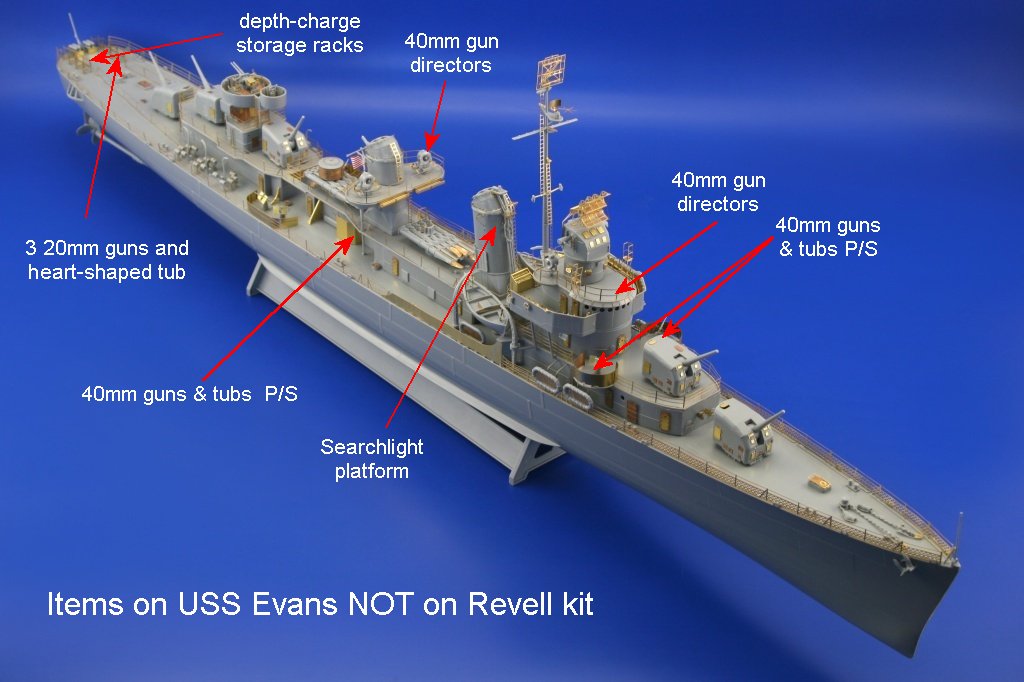 June 8th 2015: The Fletcher class destroyers came out in several variations and some underwent updates and modification. The most notable variation was between the flat front and
round front bridges, but there were also major variations in armament, especially in the numbers and placement of 20mm and 40mm AA guns. The image to the right highlights some items the
kit lacks that the Evans had - and that I will have to figure out and fabricate. Besides several platforms, I'll need to reproduce three additional twin 40mm Bofors gun mounts.
All I can do for the moment is wait for the kit and the photo-etch to arrive and see what I have to work with.
June 8th 2015: The Fletcher class destroyers came out in several variations and some underwent updates and modification. The most notable variation was between the flat front and
round front bridges, but there were also major variations in armament, especially in the numbers and placement of 20mm and 40mm AA guns. The image to the right highlights some items the
kit lacks that the Evans had - and that I will have to figure out and fabricate. Besides several platforms, I'll need to reproduce three additional twin 40mm Bofors gun mounts.
All I can do for the moment is wait for the kit and the photo-etch to arrive and see what I have to work with.
The Kit Arrives
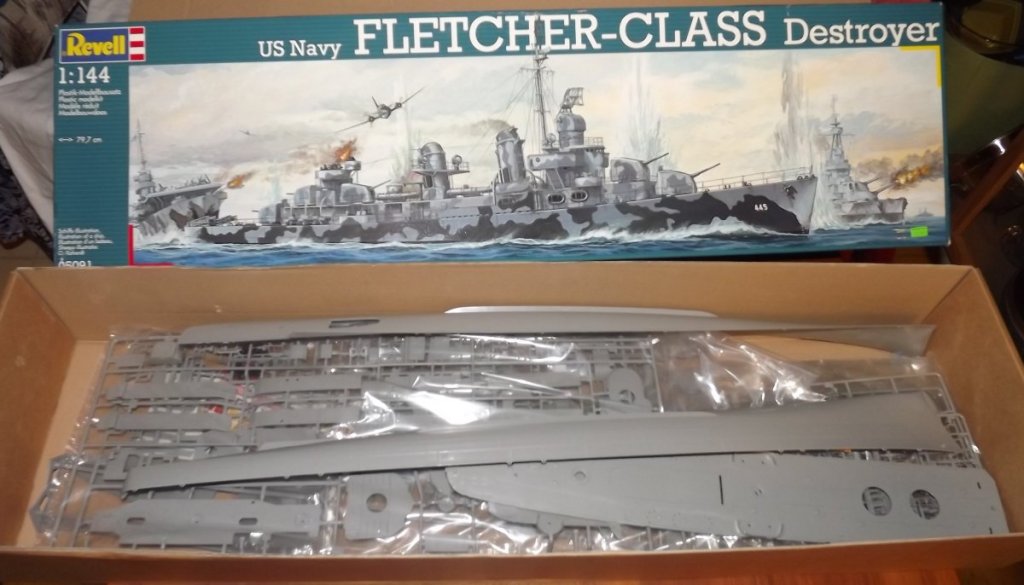
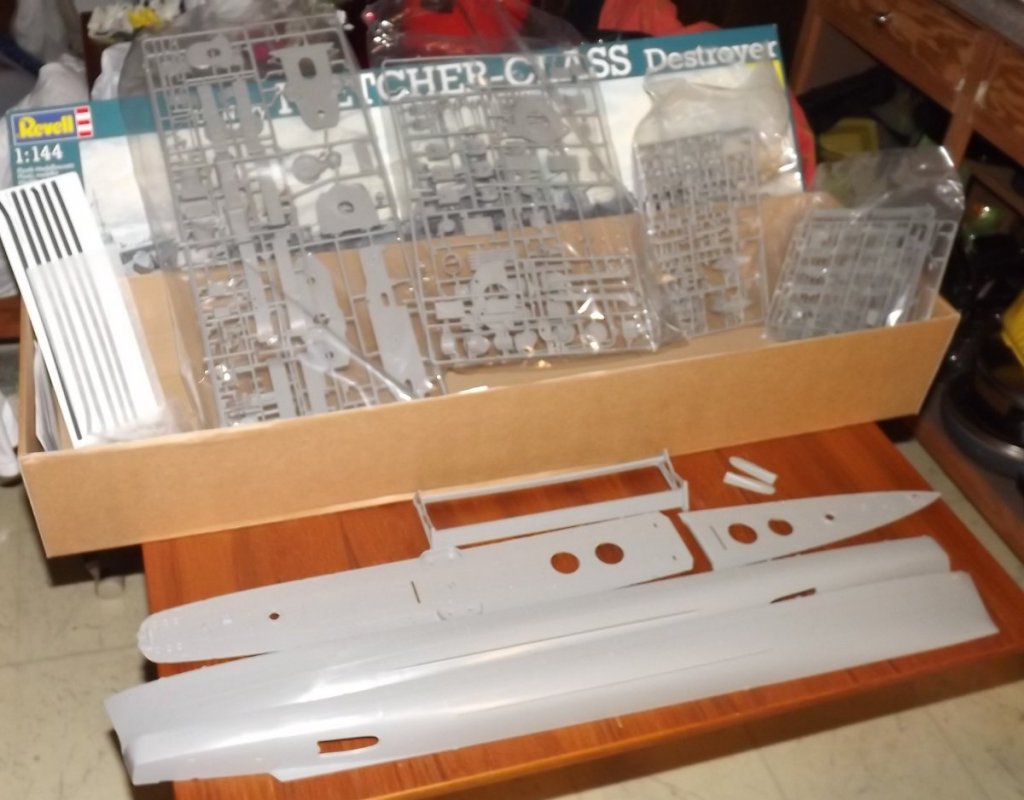
6/11: The model arrived today and I promptly opened it up and did a quick inventory looking for anything broken or missing, and eveything seemed to be as it should be.
I'm a bit bummed the photo-etch kit, that I ordered the day before the model still hasn't arrived, and sent them an email asking for status on the order.
The kit came with three books; the Squadron/Signal publications' Fletcher DDs in action, and their US Navy Ships Camouflage WWII: Destroyers and Destroyer Escorts; and the Floating Frydock's,
United States Navy Camouflage 1 of the WW2 Era. Fletchers in action may be of some help, as it contains drawing of some of the fittings like gun directors, but generally, none of the books,
at first glance, really adds anything to what I've already learned about Evan's, especially her camouflage pattern.
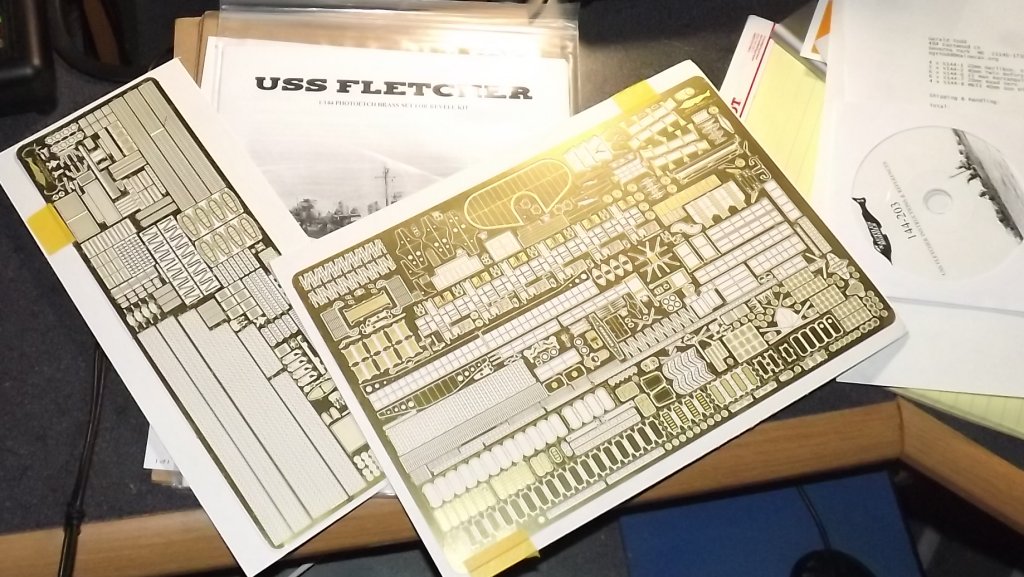 6/17: The photoetch kit from Nautilus Models arrived today. This is becoming more difficult because all the after-market items I need have become discontinued
and it looks like I'm going to have to scratch-build a lot of things to make this kit into the Evans
6/17: The photoetch kit from Nautilus Models arrived today. This is becoming more difficult because all the after-market items I need have become discontinued
and it looks like I'm going to have to scratch-build a lot of things to make this kit into the Evans
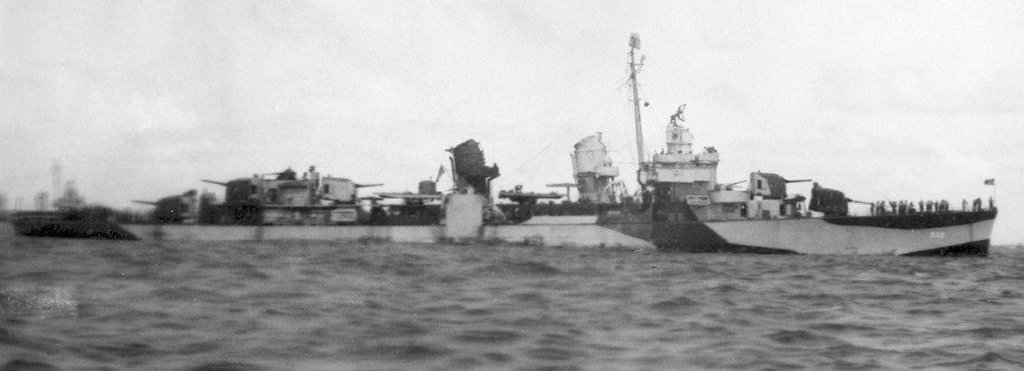
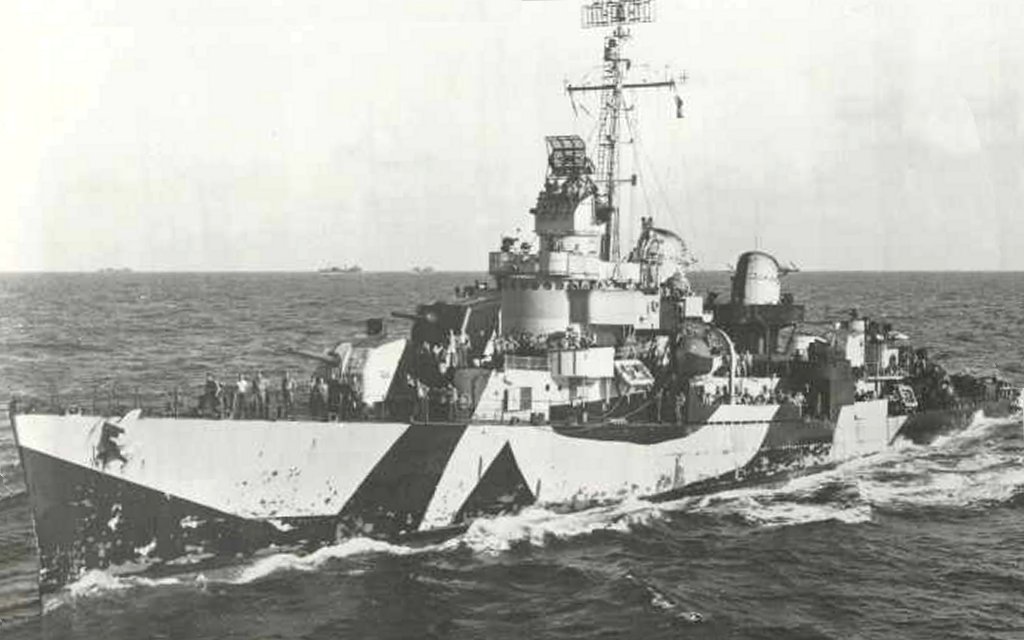
6/18: I've been collecting every image I come across, not only of the Evans, but any Fletcher class boat that may have details in common with Evans.
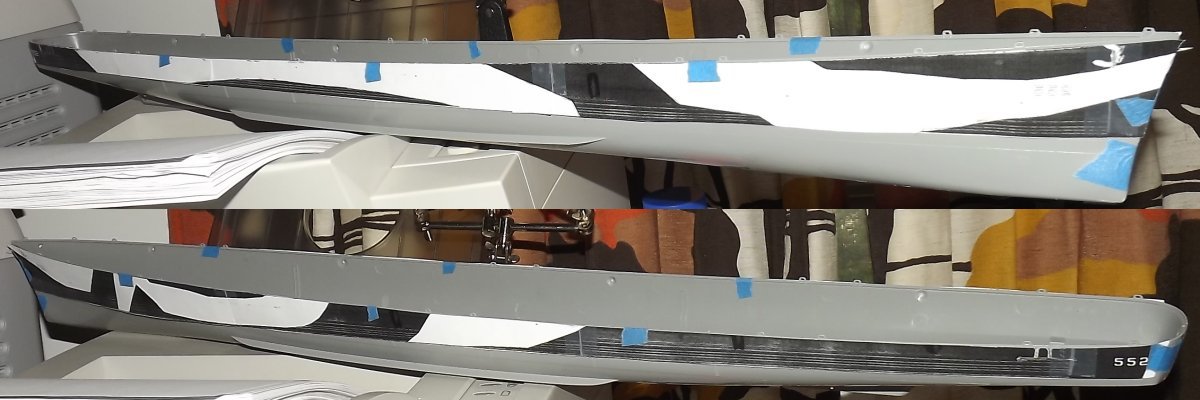
The dazzle cammo scheme is the biggest and most noticeable characteristic of the ship, and since building those old Lindberg models, I have a lot more data
on how Evans looked. She carried what was titled Measure 3_ design 7D, but while a plan was provided, every ship interpreted the scheme a little differently
and no two boats were precisely alike. Studying every image I have very closely I produced the template below which when printed full size will make marking
the Evans' camouflage scheme as accurate as I can get it.
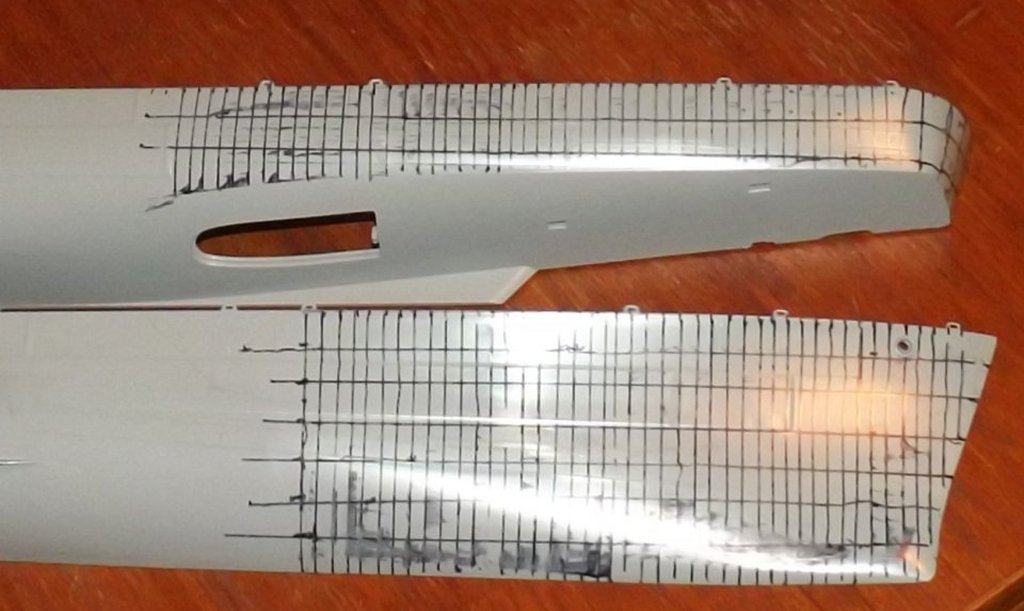
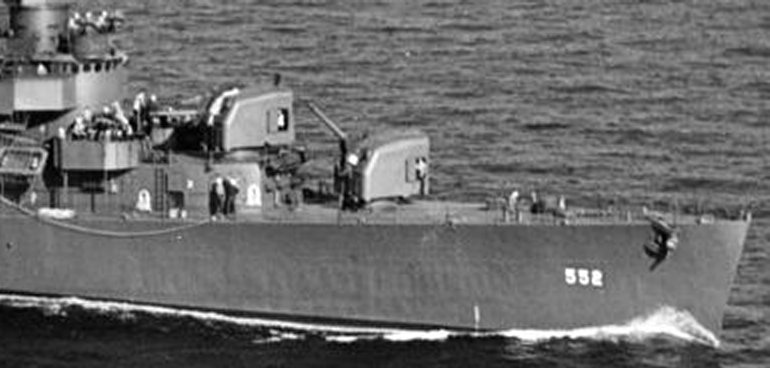 6/23: As materials arrive, I've decided to add an oil-canning effect to the hull and have been experimenting and practicing on some Evergreen styrene before I commit
to grinding and scraping on the hull. Oil-canning is where the sheet steel of the hull is dimpled inward between the frames and stringers giving something
of an egg crate appearance. Some of it comes from water-pressure against the hull, but a lot of it just happened as the steel is put in place, as can be seen in the image
of the ship when she was brand new.
6/23: As materials arrive, I've decided to add an oil-canning effect to the hull and have been experimenting and practicing on some Evergreen styrene before I commit
to grinding and scraping on the hull. Oil-canning is where the sheet steel of the hull is dimpled inward between the frames and stringers giving something
of an egg crate appearance. Some of it comes from water-pressure against the hull, but a lot of it just happened as the steel is put in place, as can be seen in the image
of the ship when she was brand new.
 The other effect I'm after will be chipping and peeling paint along with rust streaks. These boats worked hard, and their paint jobs took a beating. In my view some
chipping and peeling paint is a badge of honor. See also the image at the top of the home page.
The other effect I'm after will be chipping and peeling paint along with rust streaks. These boats worked hard, and their paint jobs took a beating. In my view some
chipping and peeling paint is a badge of honor. See also the image at the top of the home page.
 7/1: Still gathering materials and studying techniques. Paints came in and today the additional guns and other items came in. These items are white metal and it looks like
it's gonna take a LOT of work to make them usable. A big problem is finding photo-etch details for the additions Evans had over the the ship depicted in the kit.
7/1: Still gathering materials and studying techniques. Paints came in and today the additional guns and other items came in. These items are white metal and it looks like
it's gonna take a LOT of work to make them usable. A big problem is finding photo-etch details for the additions Evans had over the the ship depicted in the kit.
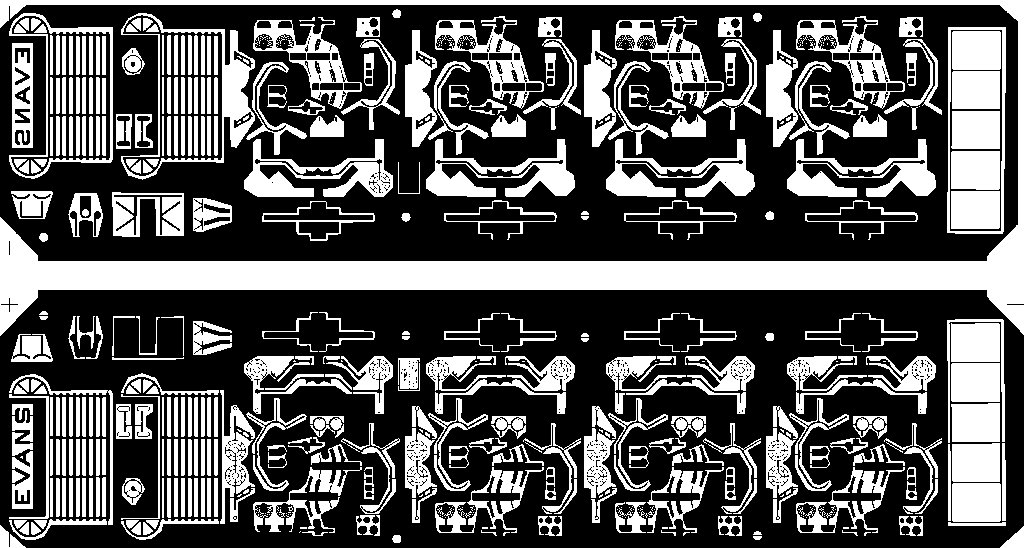 I figure the only solution is too do it myself - so I scanned the PE I have and traced the parts I need more of in my drawing program and produced the art work.
Not I'm gathering brass shim stock, laser printer transparencies, and chemicals to etch my own. I'll detail that entire process right here, so stayed tuned.
I figure the only solution is too do it myself - so I scanned the PE I have and traced the parts I need more of in my drawing program and produced the art work.
Not I'm gathering brass shim stock, laser printer transparencies, and chemicals to etch my own. I'll detail that entire process right here, so stayed tuned.
Actual Work Begins!
7/4: Using some plans scaled to the model I determined where the frame and stringers were and marked them on the hull with a fine Sharpie. Inside each rectangle will be
hollowed out slightly to give the effect of "oil-canning" as mentioned above. Though I've been at it for several hours, there's not much to show as yet.

Worklog Table of Contents:
1 - Beginning & Research; The Kit Arrives (this page)
Top
|


